Preparing flavorful meals becomes easier when you have the right tools—and the right Essential Marinade gear can completely transform how you season, store, and prepare chicken or vegetables. Below is a clear, helpful guide describing the must-have items that make marinating faster, cleaner, and more effective in any kitchen.
Marinade Injector – Your Flavor Delivery System
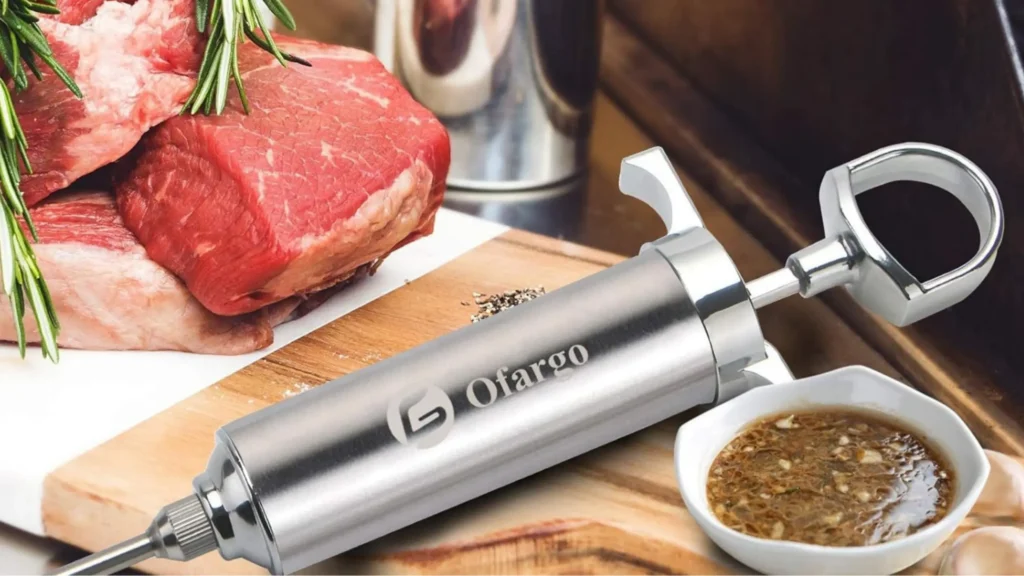
Here’s a frustrating truth: surface marinades only penetrate about 1/8 inch into chicken meat. That thick breast you’re grilling? The center is basically bland. A marinade injector solves this problem by delivering flavor directly into the deepest parts of the meat, creating juicy, flavorful chicken from the inside out.
| Feature | What to Look For |
| Material | Stainless steel barrel and needle |
| Capacity | 2-3 oz minimum |
| Needle Type | Multiple holes along the side |
| Cleaning | Disassembles completely |
| Best For | Whole chickens, thick breasts, BBQ |
Insider Secrets: What the Pros Know
The Science of Injection: Marinades work through osmosis—a slow process that takes 12 to 24 hours to complete. Injection is immediate! You can inject and cook within an hour, perfect for last-minute meals.
What to Inject (And What NOT To):
- GREAT: Butter blends, broths, citrus juices, liquid marinades, and melted herb butter
- GOOD: Thinned BBQ sauce, teriyaki sauce (strain first!)
- TERRIBLE: Chunky marinades, thick sauces, anything with seeds or large herbs (clogs needle!)
Needle Types Decoded:
- Side-hole needles – Best for chicken! Distribute the marinade evenly as you inject
- Single-tip hole – For thinner liquids, more concentrated flavor spots
- Multiple needle sizes – Thick needles for butter, thin for broths
The Injection Pattern Secret: Don’t just stab once! Use the “grid pattern”:
- Insert the needle at an angle
- Push the plunger while slowly pulling the needle back out (fills the channel)
- Inject every 1-2 inches across the meat
- Aim for 1 oz per pound of chicken
Pressure Control Matters: Inject slowly! Fast injection creates “blow-outs” where marinade shoots back out. Slow and steady wins the flavor race.
The Butter Injection Game-Changer: Melt herb butter (garlic, thyme, rosemary), let it cool slightly, then inject under the chicken skin. This is how restaurants get impossibly crispy, flavorful skin!
Temperature Trick: Inject cold marinades into cold chicken. Room-temp or warm liquids + raw chicken = bacterial playground. Food safety first!
Cleaning is critical: Marinades trapped inside injectors can grow bacteria rapidly. After every use:
- Disassemble completely
- Flush with hot soapy water immediately
- Use a pipe cleaner for the needle
- Air dry completely
Beyond Chicken – Bonus Uses:
- Inject flavor into pork chops and roasts
- Infuse moisture into the turkey breast
- Create flavored deviled eggs (yes, really!)
Common Mistakes to Avoid:
- Using chunky marinades (instant clog!)
- Injecting too fast (creates leaks)
- Not cleaning immediately after use
- Over-injecting (marinade pools and leaks during cooking)
- Using hot marinades on raw chicken
Pro Tip: Inject along the grain of the meat (in the direction of muscle fibers) rather than across it—marinade distributes more evenly this way!
Plastic & Glass Containers – Your Marinating Command Center
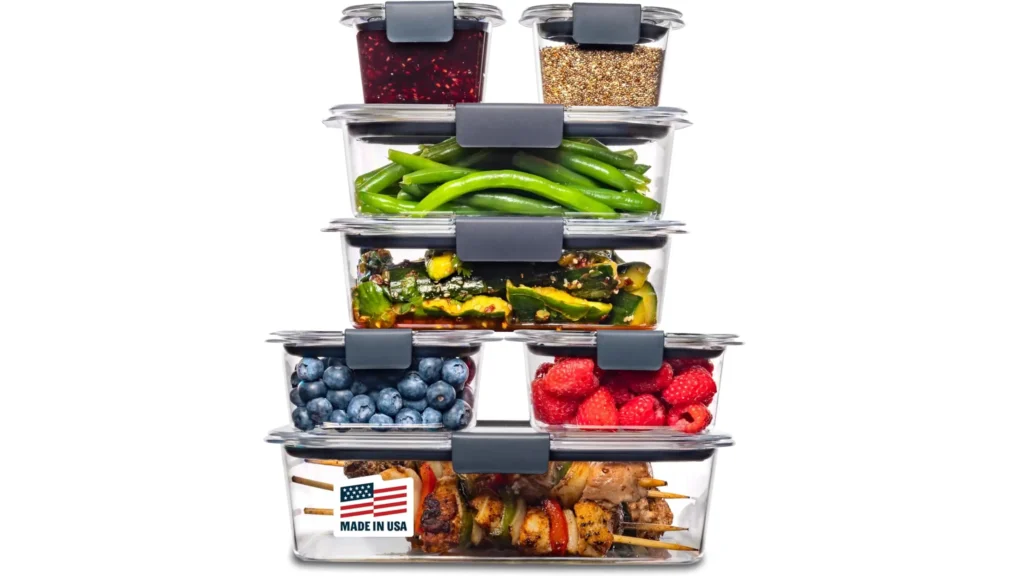
Marinating in a random bowl covered with plastic wrap is amateur hour. Proper food-safe containers with tight-sealing lids prevent leaks, protect against cross-contamination, and let you safely store chicken while it absorbs maximum flavor. Plus, they stack neatly in your fridge—no more toppling towers of marinating chaos!
| Feature | What to Look For |
| Material | BPA-free plastic or borosilicate glass |
| Seal | Airtight, leak-proof lids |
| Size | 2-4 quart range for chicken pieces |
| Shape | Rectangular for efficient fridge space |
| Best For | Marinating, meal prep, leftovers |
Insider Secrets: What the Pros Know
Glass vs. Plastic – The Ultimate Showdown:
| Feature | Glass | Plastic |
| Reactivity | Non-reactive (safe for acids) | Some plastic reacts to acidic marinades |
| Staining | Won’t stain | Turmeric/paprika stains permanently |
| Odor retention | Zero odor absorption | Can retain garlic/spice smells |
| Weight | Heavy (more stable) | Lightweight (portable) |
| Breakage | Can shatter | Virtually indestructible |
| Microwave | Always safe | Check for a microwave-safe label |
Winner for marinades: Glass, especially for acidic marinades (lemon, vinegar, yogurt)
The Marinade-to-Chicken Ratio: The Container should be just big enough for the chicken to fit in a single layer, with the marinade barely covering it. Too much space = wasted marinade!
Vacuum Seal Secret: Some containers have vacuum-pump lids that remove air. This accelerates marinade absorption by 50%! What takes 4 hours typically happens in 2 hours.
The Flipping Strategy: For even marinating without vacuum technology:
- Set a timer for every 30-60 minutes
- Flip the container over (this is why leak-proof matters!)
- Ensures all surfaces get equal flavor
Shape Matters More Than You Think:
- Rectangular – Best for chicken breasts, efficient fridge stacking
- Round – Better for whole legs or bone-in pieces
- Flat/shallow – Maximum surface area contact with marinade
- Deep – Waste marinade, uneven coverage
The Zip-Top Bag Debate: Pros use zip-top bags because:
- Squeezes out air for maximum contact
- Uses less marinade (bag conforms to meat)
- BUT… plastic waste, potential leaks, and harder to flip
Container size guide:
- Small (1-2 qt) – 2-4 chicken breasts or thighs
- Medium (3-4 qt) – 6-8 pieces or one small whole chicken (spatchcocked)
- Large (5-6 qt) – Whole chicken or batch marinating
Lid Technology to Seek:
- Snap-lock – Secure but can be stiff to open
- Silicone-seal – Easiest to open/close, best seal
- Screw-top – Most leak-proof but slower access
- Avoid: Flimsy lids that pop off easily
The Fridge Organization Secret: Rectangular containers with straight sides stack efficiently and prevent fridge Tetris. Measure your fridge shelf height before purchasing to ensure a proper fit.
Label and Date: Keep dry-erase markers or labels handy. Write what’s marinating and when it started. Raw chicken is safe to marinate for 1-2 days in the fridge.
Cleaning Pro Tips:
- Wash immediately after use (dried marinade is stubborn!)
- Use a baking soda paste for stubborn stains on plastic
- For lingering odors: stuff with crumpled newspaper overnight
Common Mistakes to Avoid:
- Using metal containers (reacts with acidic marinades)
- Marinating at room temperature (danger zone!)
- Reusing marinade that touched raw chicken without boiling it first
- Overfilling containers (marinade leaks everywhere)
- Not checking for BPA-free certification
Pro Tip: Buy nested container sets with the same lid system—you’ll only need to store one type of lid, saving central cabinet space!
Salad Spinner & Colander – Your Washing Workhorses
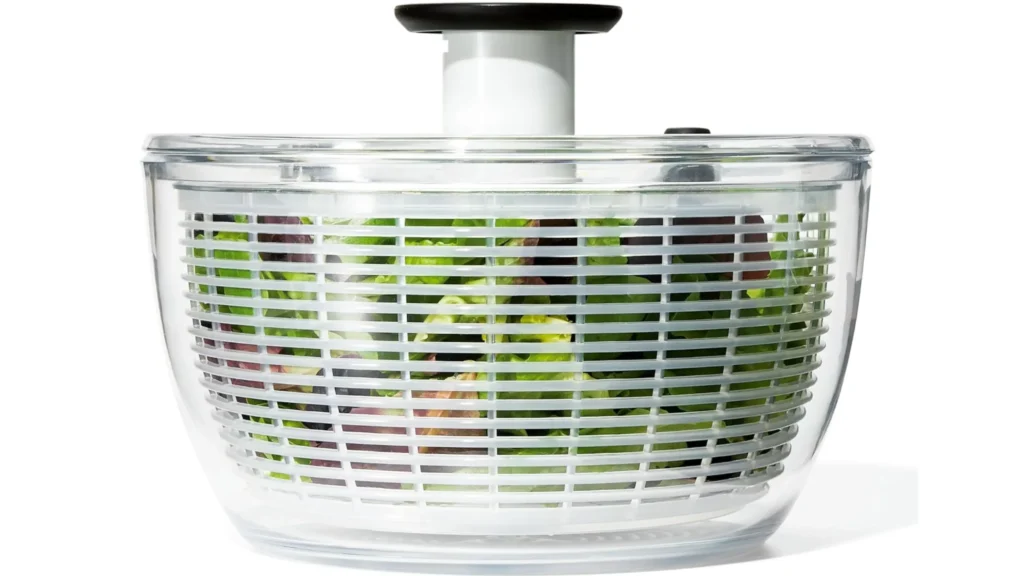
IMPORTANT NOTE: The USDA recommends NOT washing raw chicken (splashing spreads bacteria). However, salad spinners and colanders are essential for washing herbs, vegetables, and greens that accompany your chicken dishes. Additionally, colanders are ideal for draining marinades and rinsing equipment safely.
| Feature | What to Look For |
| Material | BPA-free plastic or stainless steel |
| Size | 4-5 quart capacity |
| Drainage | Multiple drainage holes |
| Stability | Non-slip base or feet |
| Best For | Washing produce, draining, drying herbs |
Insider Secrets: What the Pros Know
The Chicken Washing Controversy – What You NEED to Know:
The USDA advises: Never wash raw chicken. Here’s why:
- Splashing water spreads Campylobacter and Salmonella up to 3 feet
- Cooking to 165°F kills all bacteria anyway
- Rinsing does NOT reduce bacterial load
What salad spinners and colanders ARE for:
- Washing herbs for chicken marinades (parsley, cilantro, rosemary)
- Cleaning vegetables for sides (salads, roasted veggies)
- Draining excess marinade before cooking
- Rinsing kitchen tools and equipment
Salad Spinner Magic for Chicken Prep:
Crispy herbs = concentrated flavor! After washing cilantro, parsley, or basil for your marinade, spin them dry to remove excess moisture. Wet herbs dilute your marinade and don’t chop as cleanly.
The Three Types:
- Pull-cord spinners – Fastest, most powerful, can jam
- Pump-handle spinners – Smooth operation, reasonable control, easier for kids
- Crank-handle spinners – Old-school, slower but reliable
- Winner: Pump-handle for ease + speed balance
Size Matters for Efficiency:
- Small (2-3 qt) – Single-use herb washing
- Medium (4-5 qt) – Perfect for prep that serves 4-6 people
- Large (6+ qt) – Batch prep or prominent families
Colander Material Guide:
- Stainless steel – Professional choice, durable, dishwasher-safe, won’t stain
- Plastic – Lightweight, cheaper, can stain from beets/berries
- Silicone – Collapsible for storage, heat-resistant
- Enamel-coated – Pretty but chips over time
The Drainage Hole Secret: More holes = faster draining, BUT too many large holes = small items fall through. Look for varied hole sizes—large for leafy greens, small areas for cherry tomatoes.
Base Design Matters:
- Footed colanders – Lift food away from drained liquid (better for berries, tomatoes)
- Ring base – More stable, won’t tip in the sink
- Flat bottom – Can double as a serving bowl
The Double-Duty Trick: Use your colander to:
- Steam vegetables (fits over pots)
- Drain pasta for chicken pasta dishes
- Sift flour for breading stations
- Hold the marinated chicken while the excess drips off
Washing Produce the Right Way (For Chicken Dishes):
- Fill the spinner bowl with cold water
- Add produce and swish gently
- Let dirt settle to the bottom (2-3 minutes)
- Lift the basket out without disturbing the dirt
- Dump dirty water, repeat if needed
- Spin dry until barely damp
The Centrifugal Force Science: Spinners work by creating high-speed rotation that flings water outward. The faster the spin, the drier your herbs and greens will be.
Cleaning and Maintenance:
- Take apart completely after each use
- Scrub the center mechanism (gunk builds up)
- Air dry to prevent mold
- Sanitize monthly with a diluted bleach solution
Common Mistakes to Avoid:
- Washing raw chicken (spreads bacteria!)
- Overfilling the spinner (doesn’t dry properly)
- Not cleaning the spinner mechanism (grows mold)
- Using colanders with holes too large for what you’re washing
- Storing spinner while still damp (mildew city!)
Pro Tip: Keep separate colanders for raw meat drainage and produce washing—use color-coding (red for meat, green for produce) to prevent cross-contamination!
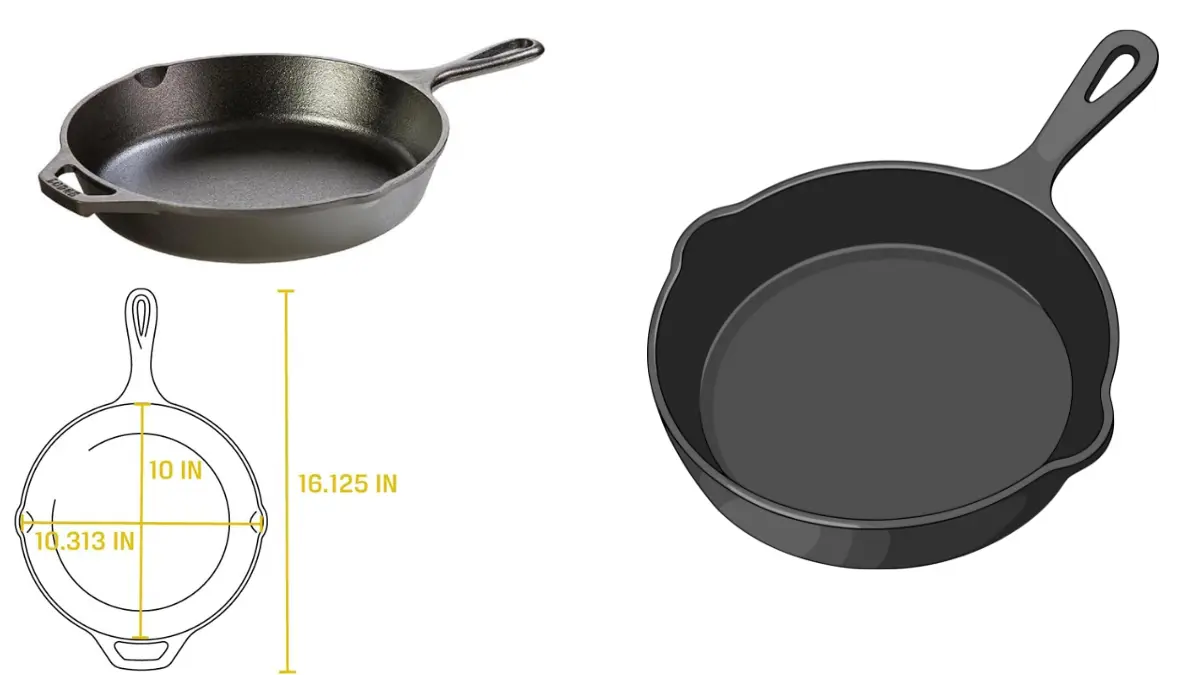
Silicone Mats & Parchment Paper – Your Non-Stick Dream Team
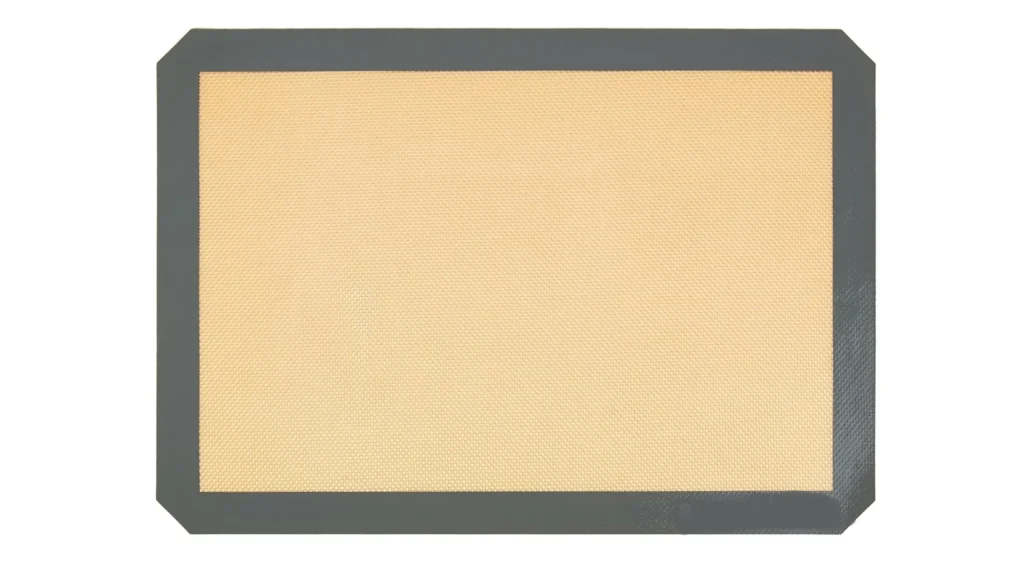
Scrubbing burnt chicken skin off baking sheets is nobody’s idea of fun. Silicone baking mats and parchment paper create a non-stick barrier that delivers perfectly crispy skin without the sticky cleanup nightmare. Plus, they’re reusable (mats) or compostable (parchment)—your cookware and the environment both win!
| Feature | What to Look For |
| Material (Mats) | Food-grade silicone, fiberglass core |
| Material (Paper) | Unbleached, non-toxic coating |
| Heat Tolerance | 450°F minimum |
| Size | Standard half-sheet (16.5″ x 11.5″) |
| Best For | Roasting, baking, and easy cleanup |
Insider Secrets: What the Pros Know
Silicone Mats vs. Parchment Paper – When to Use What:
| Factor | Silicone Mats | Parchment Paper |
| Reusability | 2,000+ uses | Single-use |
| Cost per use | Pennies | $0.10-0.25 per sheet |
| Heat max | Usually 480°F | Usually 425-450°F |
| Crispiness | Less crispy (traps moisture) | Crispier results |
| Cleanup | Wash and reuse | Toss and done |
| Best for | Cookies, delicate items | Roasted chicken, high-heat |
| Environment | Eco-friendly long-term | Compostable but single-use |
Winner for roasted chicken: Parchment paper—better crisping! Winner for baked chicken: Silicone mats—easy cleanup!
The Temperature Zone Chart:
- Below 350°F – Either works great
- 350-425°F – Both fine, parchment gives crispier skin
- 425-450°F – Use high-heat parchment or quality silicone
- Above 450°F – Check mat rating! Many silicone mats max at 480°F
The Crispy Skin Secret: Silicone mats trap a tiny bit of moisture between the mat and food. For maximum crispiness on roasted chicken:
- Use parchment paper instead, OR
- Elevate the chicken on a wire rack over a silicone mat (the best of both worlds!).
Parchment Paper Types:
- Bleached – White, aesthetically pleasing, chemical process
- Unbleached – Brown, more natural, no chlorine
- Pre-cut sheets – Convenient, pricier per sheet
- Rolls – Economical, cut to custom sizes
- Pre-creased – Fits air fryers and specific pans
Silicone Mat Quality Indicators:
- Fiberglass reinforcement – Prevents warping and degrading
- Food-grade silicone – Must be FDA-approved
- Uniform thickness – Thin spots = hot spots = uneven cooking
- Temperature rating – Look for 480°F minimum
The Sheet Pan Sizing Secret:
- Half-sheet pan – 18″ x 13″ (most common)
- Mat/paper size – 16.5″ x 11.5″ (fits with room for air circulation!)
- Leave that gap! Air flow = crispier results
The Rim-Height Trick: Mats and paper lie flat, but the chicken releases juices. Use a rimmed baking sheet (at least 1″ high sides) to contain liquids and prevent oven fires!
Pre-Cutting Parchment Hack: Measure your most frequently used pans, cut 10-20 sheets at a time, and stack them in a drawer. Meal prep becomes lightning fast!
Grease or No Grease?
- Silicone mats – Never grease! Ruins the non-stick properties
- Parchment paper – No greasing needed for chicken (natural fats)
- Exception – Light oil spray for extra-lean chicken breasts
Cleaning Silicone Mats:
- Wash with hot soapy water after each use
- For stubborn grease: baking soda paste scrub
- For odors: soak in a vinegar-water solution
- Air dry or towel dry completely
- Store flat or rolled (never fold—this creates weak spots!).
When to Replace:
- Silicone mats – Tears, warping, tacky residue that won’t wash off
- Parchment paper – After one use! (Safety and quality decline)
The Air Fryer Adaptation: Cut parchment to fit the air fryer baskets, but make sure to punch holes for optimal air circulation. Solid parchment blocks airflow, defeating its purpose.
Beyond Chicken – Bonus Uses:
- Line countertops for breading stations
- Wrap herb butter logs for freezing
- Create non-slip surfaces for mixing bowls
- Cover the dough while rising
The Environmental Choice: If you roast chicken weekly:
- Year 1: Parchment = 52 sheets of waste
- Year 1: Silicone mat = 0 sheets of waste (costs more upfront, breaks even by month 3)
Common Mistakes to Avoid:
- Using silicone mats above their temp rating (melts!)
- Greasing silicone (makes it sticky)
- Cutting directly on mats (knife damage)
- Using parchment paper multiple times (fire hazard!)
- Blocking air fryer vents with solid parchment
Pro Tip: Buy parchment paper in bulk packs from restaurant supply stores—you’ll pay half the price of grocery store boxes and never run out mid-recipe!
Complete Marinade & Prep Tool Comparison at a Glance
| Tool | Primary Use | Must-Have Feature | Insider Secret | Price Range |
| Marinade Injector | Deep flavor infusion | Side-hole needle | Inject along the muscle grain for even distribution | $10-30 |
| Storage Containers | Safe marinating | Airtight glass/BPA-free plastic | Vacuum-seal lids cut marinade time in half | $15-45 |
| Salad Spinner/Colander | Washing produce | 4-5 qt capacity, non-slip | Never wash raw chicken—it spreads bacteria! | $15-35 |
| Silicone Mats/Parchment | Non-stick cooking | 450°F+ heat tolerance | Parchment = crispier; silicone = easier cleanup | $8-25 |
The Prep Tools Impact: Before & After
| Cooking Aspect | Without Prep Tools | With Prep Tools |
| Flavor depth | Surface-level only | Infused throughout |
| Food safety | Risk of cross-contamination | Contained and controlled |
| Cleanup time | 15+ minutes of scrubbing | 2 minutes or toss-and-done |
| Crispy skin | Sticks to the pan, tears apart | Releases perfectly intact |
| Marinade waste | Excess pools, uneven coverage | Vacuum-sealed efficiency |
Ready to Prep Like a Pro?
Stop settling for mediocre chicken and frustrating cleanup—invest in tools that deliver maximum flavor with minimum effort! These four prep essentials transform your chicken from “meh” to “magnificent,” and your cleanup from painful to practically non-existent. Whether you’re meal-prepping for the week or hosting Sunday dinner, these tools have you covered!
Frequently Asked Questions
Can I use a marinade injector for turkey as well?
Absolutely! Marinade injectors are perfect for turkey, especially the breast meat, which tends to dry out. Same technique—inject every 1-2 inches.
How long can I marinate chicken in the fridge?
1-2 days maximum in a sealed container at 40°F or below. Longer than that, and the texture breaks down due to the acid in marinades.
Should I wash raw chicken before cooking?
No! The USDA strongly advises against it. Cooking to 165°F kills all bacteria—washing just spreads germs around your kitchen.
Can I reuse parchment paper?
Not safely. Used parchment has grease, potential bacteria, and degraded heat tolerance. Always use fresh sheets for food safety.
What’s better for the environment—silicone mats or compostable parchment?
Long-term, silicone mats win. They last for years, eliminating thousands of single-use sheets. The initial cost is higher, but the environmental impact is lower.